VAPIX Commander
VAPIX Commander sends VAPIX requests to your devices. Pick ready-made commands from the library, fill in their fields and roll them out to any number of devices. Or send one request to one device and look at the answer.
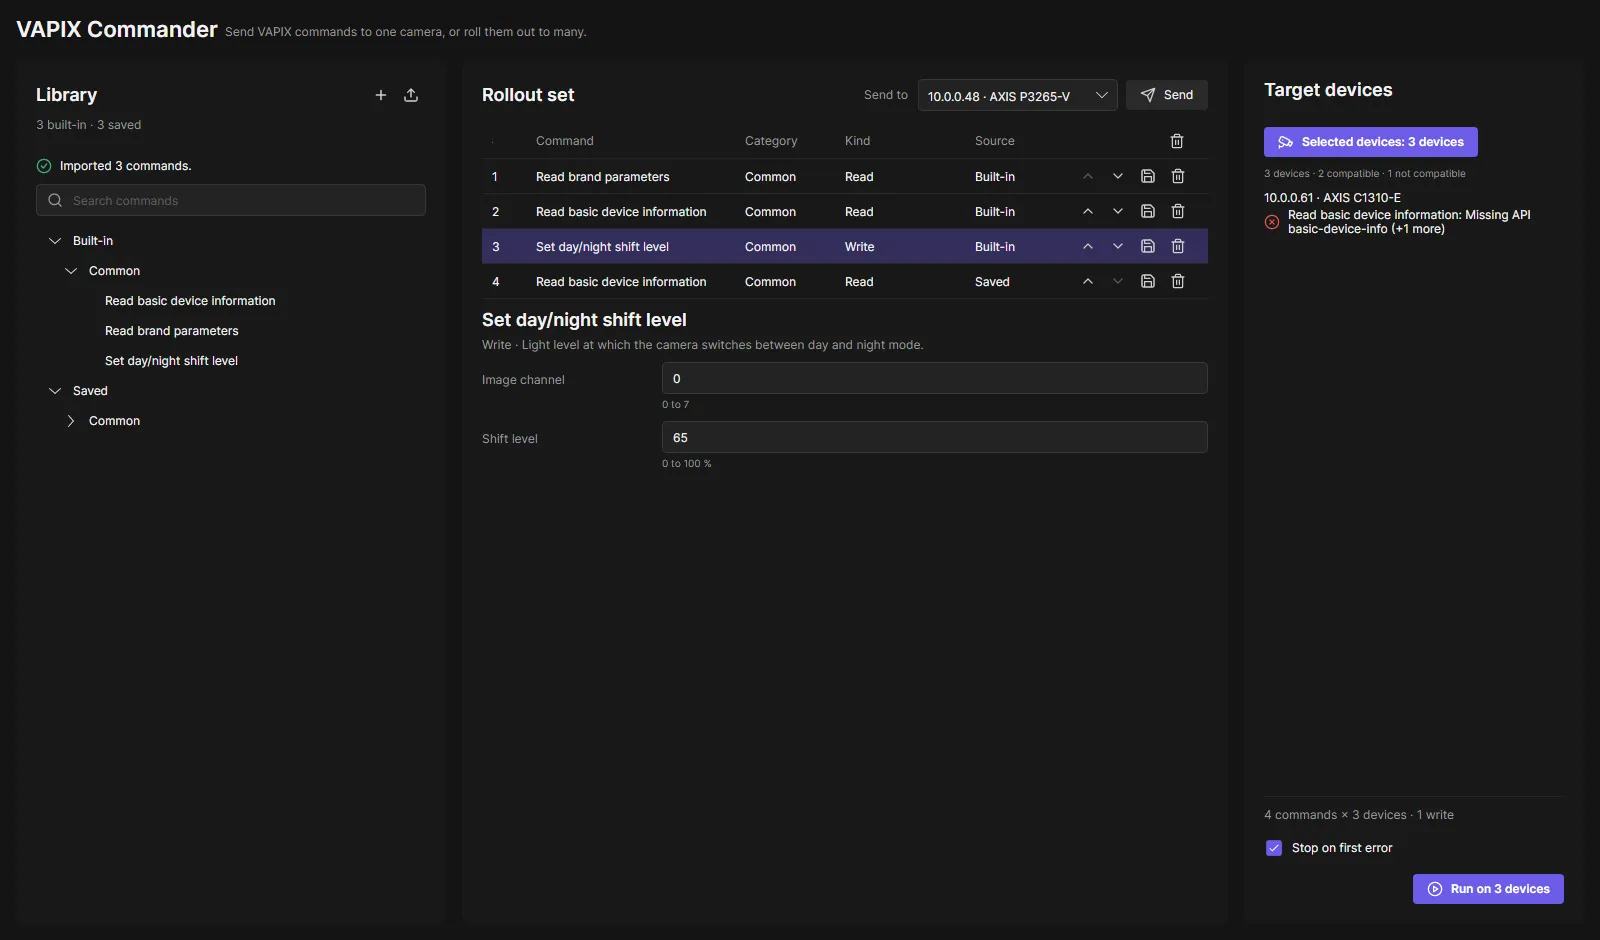
The page has three cards:
- Library: the built-in commands and your saved commands, grouped by category. + writes a new command.
- Rollout set: the commands to run.
- Target devices: the devices to run on, with a compatibility check per device.
Roll out commands
Section titled “Roll out commands”- Open VAPIX Commander in the navigation rail.
- In the Library, click a command to add it to the rollout set. Add as many as you need.
- Select a row in the rollout set and fill in its fields. Errors show below the field while you type.
- In Target devices, click Choose devices and pick all devices, tags or single devices. The devices you selected on the Devices page are chosen to start with. Devices that do not support every command are listed below.
- Leave Stop on first error on if the rollout should stop after the first failure.
- Click Run on N devices and confirm. Commands that change a device are listed in the confirmation. Dangerous commands need a second confirmation.
Each device becomes one task in the Tasks pane below the page. Each command is one step with its result, for example “Product: P3265-V”. A command the device does not support fails with “Nothing was sent”.
Send one request
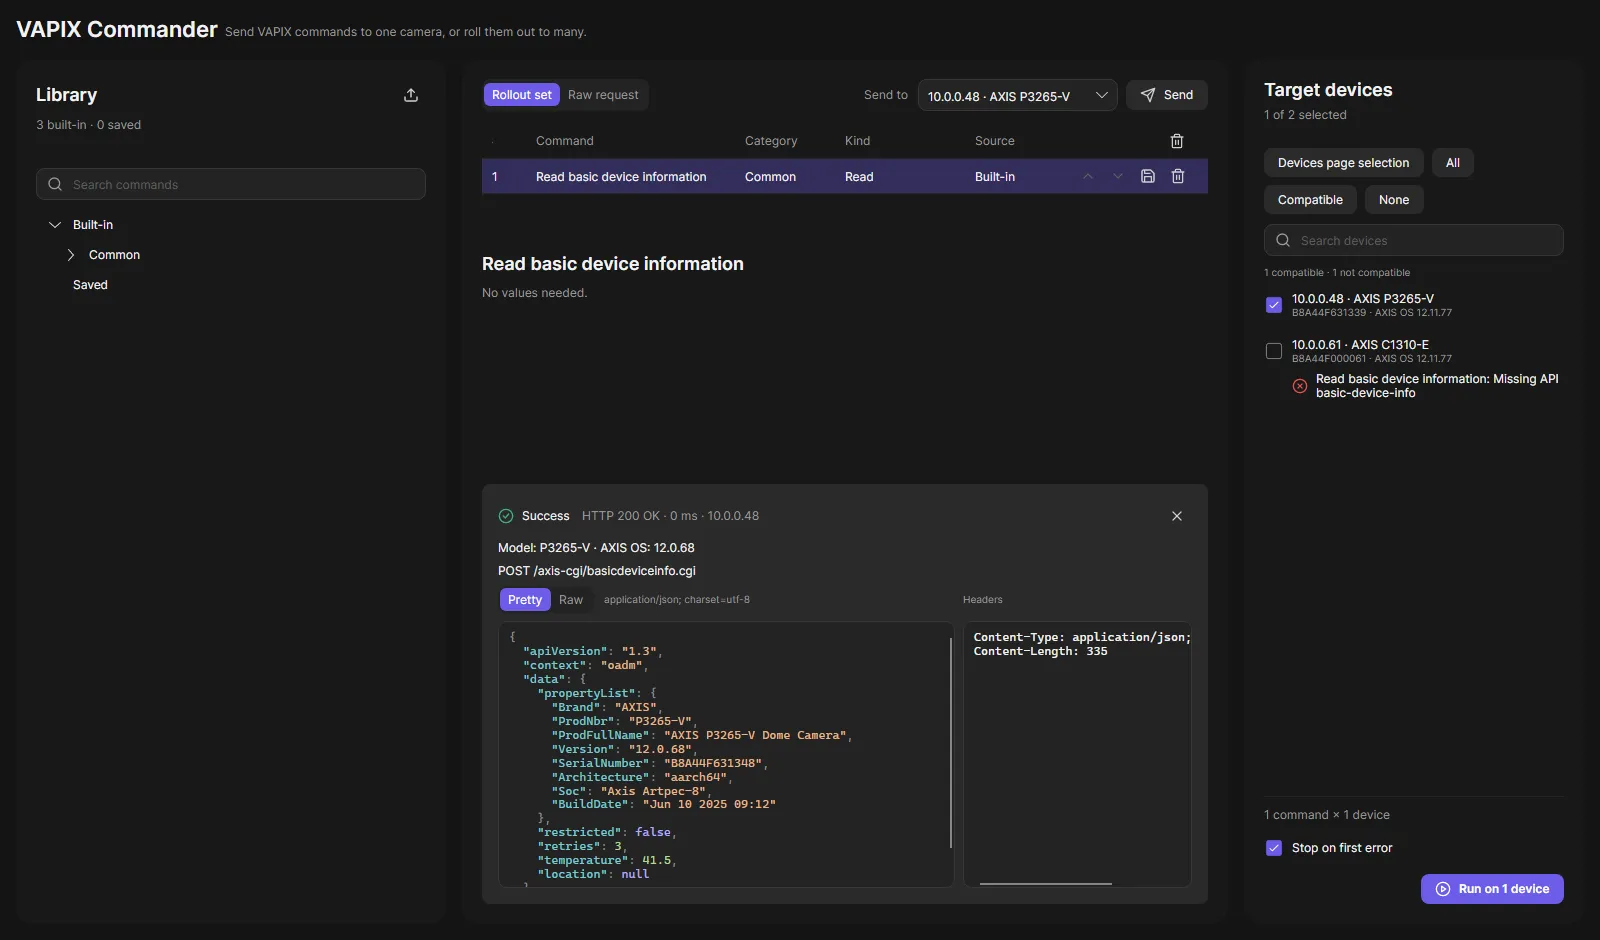
Section titled “Send one request”- Select a command in the rollout set.
- Choose the device in Send to.
- Click Send.
The result shows the status, the time it took, the interpreted result, the request line, the answer and its headers. JSON and XML answers are shown formatted; Raw shows the exact text the device sent.
Write your own command
Section titled “Write your own command”For anything the library does not have, write the request yourself, like Postman for one camera.
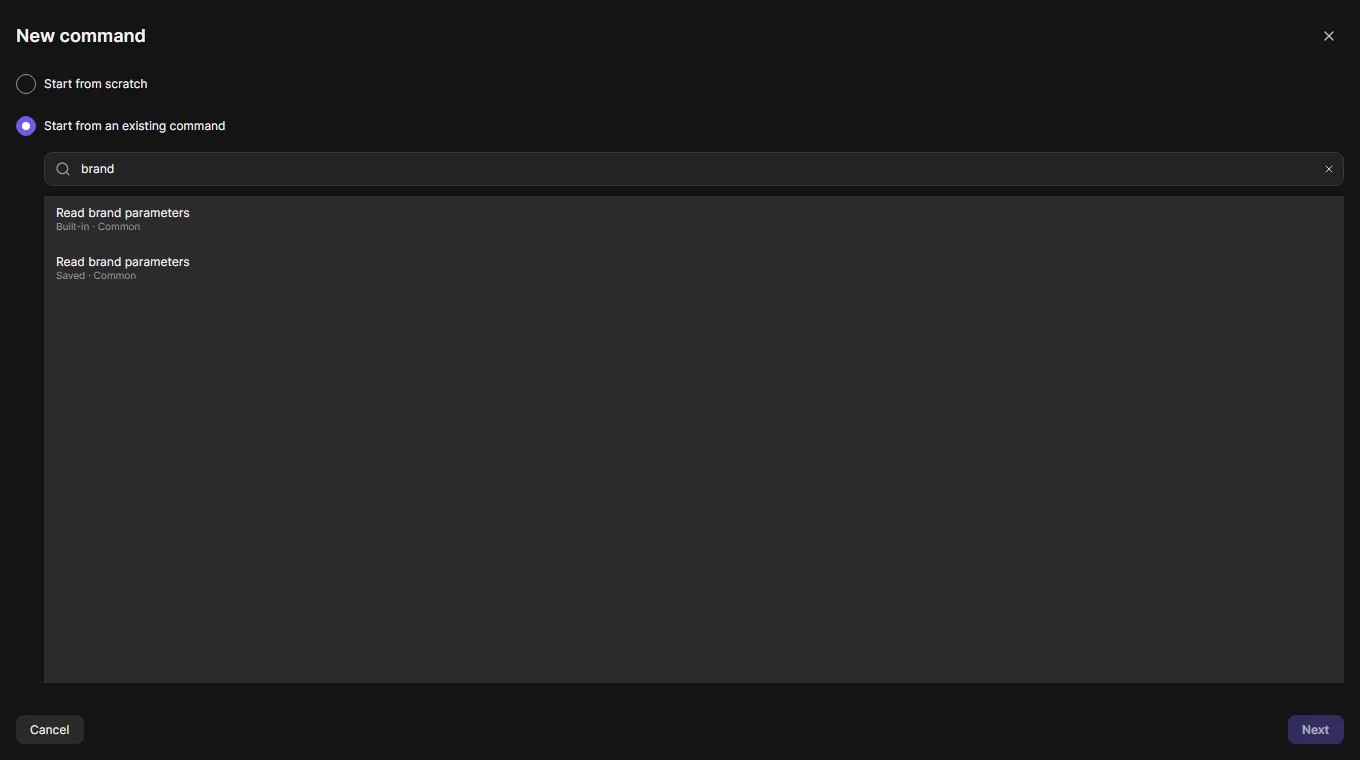
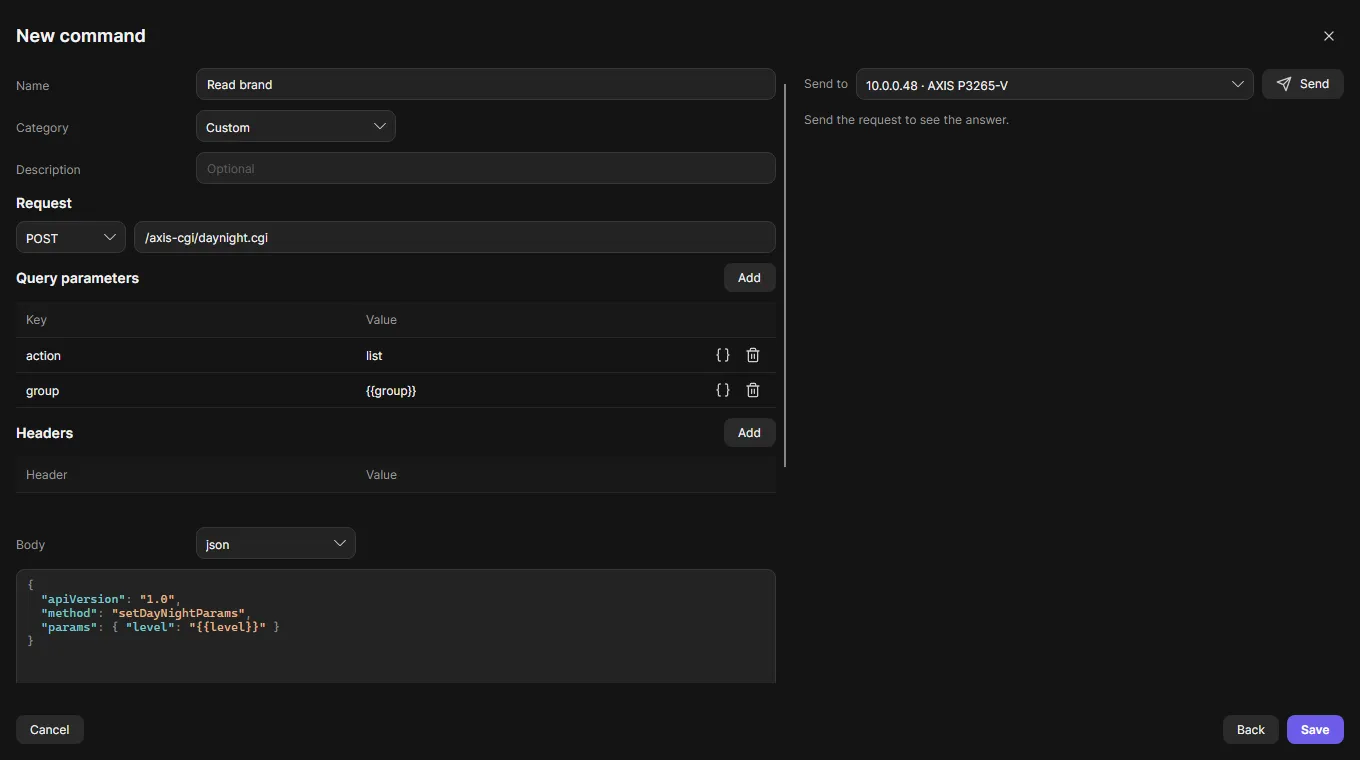
- Click + in the Library.
- Choose Start from scratch, or Start from an existing command and pick one. A built-in or saved command is copied; the original stays as it is.
- Click Next, give the command a name and write the request.
- Try it with Send on the right.
- Click Save. The command is in the library under Saved.
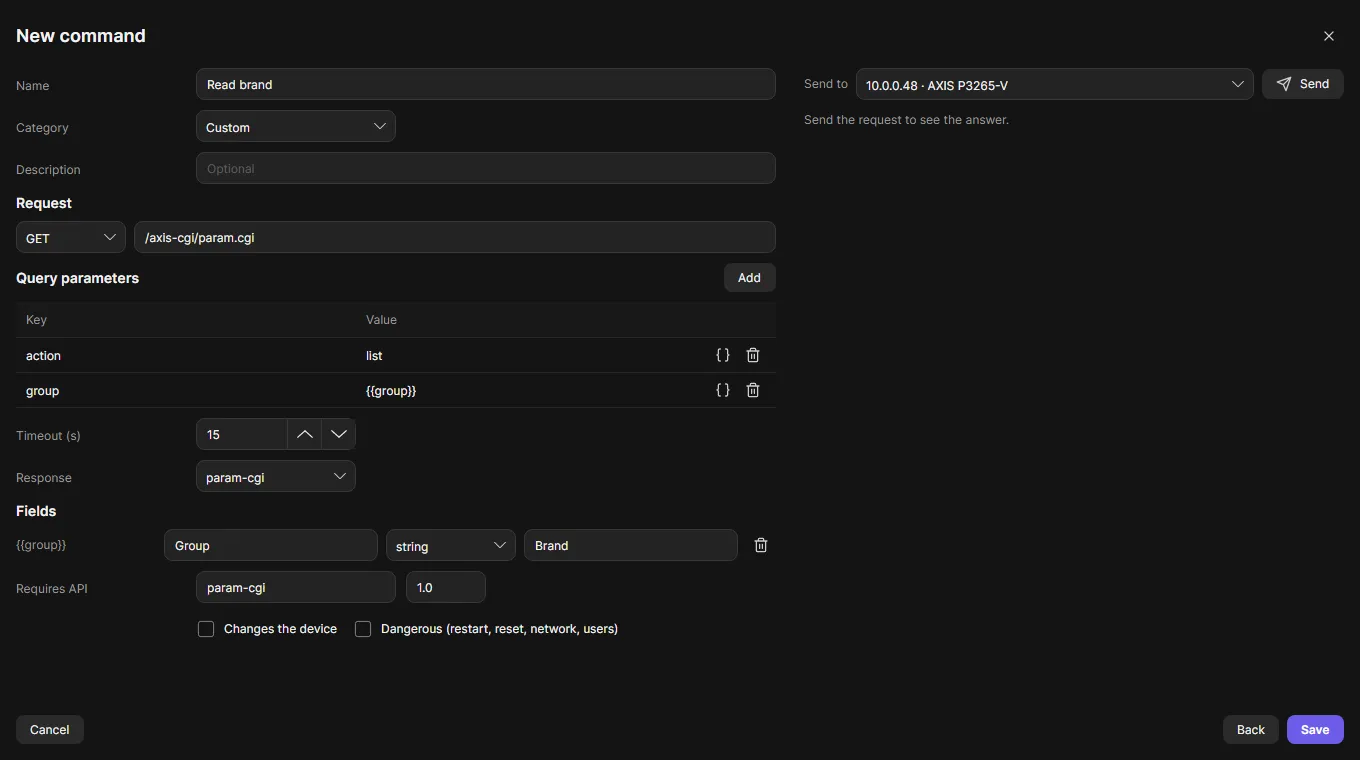
- Method and path: for example
GET/axis-cgi/param.cgi. The path always starts with/and stays on the device. - Query parameters: one row per parameter, for example
action=list,group=Brand. Add adds a row; the icons at the end of a row make a field of it or remove it. - Headers: only needed for some APIs. A GET request has none, so the table is hidden there.
- Body: for POST, PUT and PATCH. Choose json, form (
key=value&key2=value), text or xml. JSON and XML are colored while you type. A GET request has no body, so the body is hidden there. - Timeout and Response: how long to wait and how OADM reads the answer (param.cgi lines, JSON-RPC, REST, XML or text). Both are filled in from the path for the known Axis APIs.
- Reset starts a new request.
Fields: values you fill in later
Section titled “Fields: values you fill in later”A field turns a fixed value into an input. A saved command then asks for that value, so next time you only fill in the form and never touch the request again.
- Query and headers: click the
{ }icon of the row (Make field). OADM names the field after the key (ImageSource.I0.DayNight.ShiftLevelbecomesshiftLevel) and guesses its type from the value (number, yes/no, text). - Body and anywhere else: type
{{name}}where the value goes. The field appears below at once. - In JSON, write a whole value as
"{{level}}"(with the quotes). If the field is a number or yes/no, OADM sends a real number or true/false:"level": "{{level}}"goes out as"level": 40. - Below the request, each field has a label, a type (text, number, yes/no, password) and a value for this send.
- Renaming a placeholder while you type keeps the field’s label, type and value.
- The remove icon of a field puts its value back where the placeholder was.
{ "apiVersion": "1.0", "method": "setDayNightParams", "params": { "level": "{{level}}", "note": "{{note}}" }}Save and change commands
Section titled “Save and change commands”A saved command has a name, a category, a short description, the API it needs (filled in from the path, for example
param-cgi 1.0), whether it changes the device and whether it is dangerous. Saved commands are stored on the server
and shared by all clients. You can export them as a file and import them on another server.
To change a saved command, point at it in the library and click the pen icon. Change it and click Save. For a variant, use + and start from the saved command instead.
Use it in event rules
Section titled “Use it in event rules”The event rule action Run VAPIX command runs a saved command. A text field of the command can take a value of the
event: type {carID}, {port} or {device} (single braces) as the field’s value, and OADM fills it in when the rule
runs. The info icon next to an event in the rule lists the values it has.
Good to know
Section titled “Good to know”- Requests always go to the device’s own address. Paths that point to another host are refused.
- Passwords in command fields are stored encrypted, never shown again and never exported. They show as
***in request lines. - The compatibility check uses the device information OADM already has. Before a command changes a device, the server checks again with fresh data.
- Commands that send and rollouts are written to the audit log.
- Writes and dangerous are two different marks. A command that changes the device asks for a confirmation before a rollout. Dangerous commands (restart, factory default, firmware roll back, network settings) need a second confirmation and, in event rules, Allow dangerous commands.